分布式消息队列RocketMQ
二、 RocketMQ的安装与启动
2.4)控制台的安装与启动
RocketMQ有一个可视化的dashboard,通过该控制台可以直观的查看到很多数据。
2、 4.1)下载;
下载地址:https://github.com/apache/rocketmq-externals/releases/tag/rocketmq-console-1.0.0
解压到相应目录
2、 4.2)修改配置;
修改其src/main/resources中的application.properties配置文件【server.port和rocketmq.config.namesrvAddr】
server.contextPath=
server.port=17030
#spring.application.index=true
spring.application.name=rocketmq-console
spring.http.encoding.charset=UTF-8
spring.http.encoding.enabled=true
spring.http.encoding.force=true
logging.config=classpath:logback.xml
#if this value is empty,use env value rocketmq.config.namesrvAddr  NAMESRV_ADDR | now, you can set it in ops page.default localhost:9876
rocketmq.config.namesrvAddr=127.0.0.1:9876
#if you use rocketmq version < 3.5.8, rocketmq.config.isVIPChannel should be false.default true
rocketmq.config.isVIPChannel=
#rocketmq-console's data path:dashboard/monitor
rocketmq.config.dataPath=/tmp/rocketmq-console/data
#set it false if you don't want use dashboard.default true
rocketmq.config.enableDashBoardCollect=true
2、 4.3)添加依赖;
在解压目录rocketmq-console的pom.xml中添加如下JAXB依赖
JAXB,Java Architechture for Xml Binding,用于XML绑定的Java技术,是一个业界标准,是一 项可以根据XML Schema生成Java类的技术。
     * *<dependency>
 * * * * * *<groupId>javax.xml.bind</groupId>
 * * * * * *<artifactId>jaxb-api</artifactId>
 * * * * * *<version>2.3.0</version>
 * * * *</dependency>
 * * * *<dependency>
 * * * * * *<groupId>com.sun.xml.bind</groupId>
 * * * * * *<artifactId>jaxb-impl</artifactId>
 * * * * * *<version>2.3.0</version>
 * * * *</dependency>
 * * * *<dependency>
 * * * * * *<groupId>com.sun.xml.bind</groupId>
 * * * * * *<artifactId>jaxb-core</artifactId>
 * * * * * *<version>2.3.0</version>
 * * * *</dependency>
 * * * *<dependency>
 * * * * * *<groupId>javax.activation</groupId>
 * * * * * *<artifactId>activation</artifactId>
 * * * * * *<version>1.1.1</version>
 * * * *</dependency>
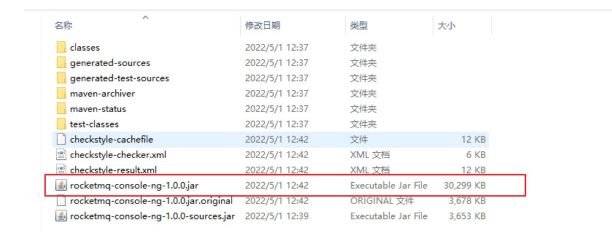
2、 4.4)打包;
在rocketmq-console目录下运行maven的打包命令
mvn clean package -Dmaven.test.skip=true
在traget目录下得到相应 jar 包
2、 4.5)启动;
执行启动命令
java -jar .\rocketmq-console-ng-1.0.0.jar
2、 4.6)访问;
按照配置文件,访问 http://127.0.0.1:17030/#/
如下图:

版权声明:本文不是「本站」原创文章,版权归原作者所有 | 原文地址: