**作者简介:一位大四、研0学生,正在努力准备大四暑假的实习
*上期文章:Redis:原理速成+项目实战——Redis实战11(达人探店(Redis实现点赞、热榜))
*订阅专栏:Redis:原理速成+项目实战
希望文章对你们有所帮助
上一节用Redis实现了对笔记的点赞,现实生活中当访问其他用户的笔记的时候,一般也会有个关注该用户的按钮,比如你可以写这篇博客的作者点点关注,嘻嘻嘻。
除了简单的关注和取关,还可以在用户之间查看到共同关注的用户,并实现关注推送,最后粉丝查看消息推送的时候要能够实现滚动分页查询,这样看起来更符合现实的社交类APP。
这一部分有些内容就是单纯的CRUD,不得不说做CRUD真是爽,简单且不耗时间,后面的滚动分页查询细节还是有点多的。
好友关注、推送、滚动分页查询
- 关注和取关
- 用户主页
- Redis实现共同关注
-
- 改造关注功能
- 实现共同关注
- Feed流(关注推送)
-
- 方案分析
- 推送到粉丝收件箱
- 滚动分页查询收件箱
-
- 思路
- 实现
关注和取关
当我们点击关注/取关按钮的时候,将会发起请求,请求包含被关注用户的id,以及true或false来分别表示你的动作是关注还是取关。
因此,当我们打开笔记的详情页的时候,就应该要主动发起一个GET请求,携带信息,来表示你有没有关注过当前用户。
基于此,我们要实现2个接口:
1、关注和取关
2、判断是否关注
用户之间是多对多之间的关系,需要一个中间表tb_follow:

我以前做项目的时候都是喜欢在这里加一个boolean字段,关注了就true否则就false,但是这边没有这个字段,我也不做修改了,就这么做下去,当取关的时候就直接删除这条数据就好了。
这个业务其实就是增删改查,非常简单。
FollowController:
@RestController
@RequestMapping("/follow")
public class FollowController {


    @Resource
    private IFollowService followService;

    @PutMapping("/{id}/{isFollow}")
    public Result follow(@PathVariable("id") Long followUserId, @PathVariable("isFollow") Boolean isFollow){


        return followService.follow(followUserId, isFollow);
    }

    @GetMapping("/or/not/{id}")
    public Result isFollow(@PathVariable("id") Long followUserId){


        return followService.isFollow(followUserId);
    }
}
FollowServiceImlp:
@Service
public class FollowServiceImpl extends ServiceImpl<FollowMapper, Follow> implements IFollowService {


    @Override
    public Result follow(Long followUserId, Boolean isFollow) {


        Long userId = UserHolder.getUser().getId();
        //判断当前状态是关注还是取关
        if(isFollow){


            //关注,新增数据
            Follow follow = new Follow();
            follow.setUserId(userId);
            follow.setFollowUserId(followUserId);
            save(follow);
        }else{


            //取关,删除数据
            remove(new QueryWrapper<Follow>()
                    .eq("user_id", userId).eq("follow_user_id", followUserId));
        }
        return Result.ok();
    }

    @Override
    public Result isFollow(Long followUserId) {


        Long userId = UserHolder.getUser().getId();
        //查询是否关注
        Integer count = query().eq("user_id", userId).eq("follow_user_id", followUserId).count();
        return Result.ok(count > 0);
    }
}
用户主页
当在笔记中点击该用户头像的时候会跳转到其主页:
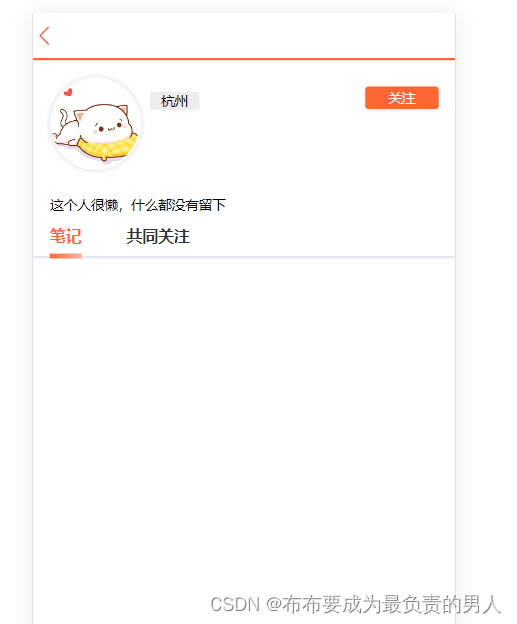
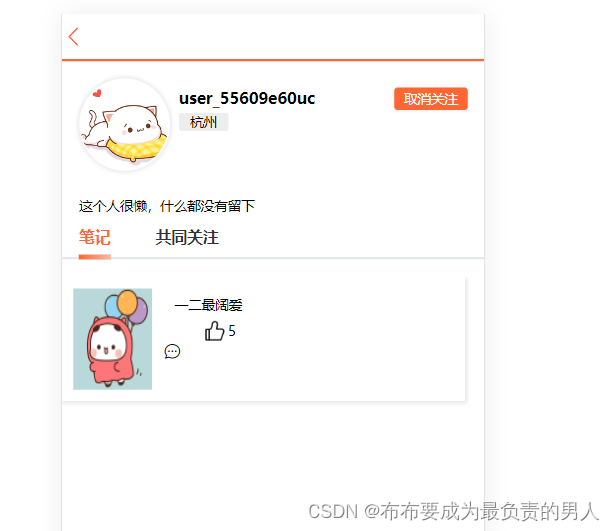
在这里我们应该要发起2个GET请求:
1、 根据该用户的id查询该用户;
2、 查询该用户的所有笔记;
其实还是一通增删改查。
UserController:
	@GetMapping("/{id}")
    public Result queryUserById(@PathVariable("id") Long userId){


        return userService.queryUserById(userId);
    }
UserServiceImpl:
	@Override
    public Result queryUserById(Long userId) {


        User user = getById(userId);
        if(user == null){


            return Result.ok();
        }
        UserDTO userDTO = BeanUtil.copyProperties(user, UserDTO.class);
        return Result.ok(userDTO);
    }
BlogController:
	@GetMapping("of/user")
    public Result queryBlogByUserId(
            @RequestParam(value = "current", defaultValue = "1") Integer current,
            @RequestParam("id") Long id){


        return blogService.queryBlogByUserId(current, id);
    }
BlogServiceImpl:
	@Override
    public Result queryBlogByUserId(Integer current, Long id) {


        //根据用户查询笔记
        Page<Blog> page = query()
                .eq("user_id", id).page(new Page<>(current, SystemConstants.MAX_PAGE_SIZE));
        //获取当前页信息
        List<Blog> records = page.getRecords();
        return Result.ok(records);
    }
Redis实现共同关注
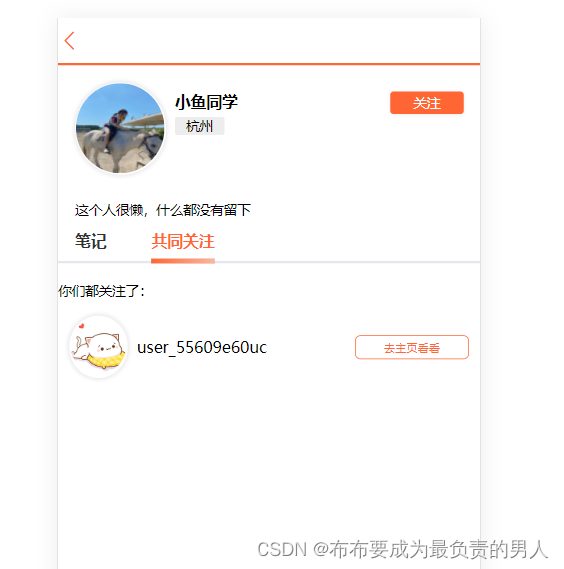
这个功能的实现思路也很容易,因为我们已经拥有了当前用户以及写文章用户的id,都根据id查询关注以后,求个交集即可。
为了提高性能,在Redis中选用set来做,set也拥有求交集的命令。
但是,这就有一个问题,要实现交集,我们首先要找到这两个用户对应的set集合,所以每当用户点击关注功能的时候,都应该将自己关注的这个用户id保存到Redis中去,这样会方便我们后序实现共同关注功能的查询。
改造关注功能
每次关注的时候,关注对象除了要放在数据库中,还要放到Redis中:
	@Resource
    private StringRedisTemplate stringRedisTemplate;

    @Override
    public Result follow(Long followUserId, Boolean isFollow) {


        Long userId = UserHolder.getUser().getId();
        String key = "follows:" + userId;
        //判断当前状态是关注还是取关
        if(isFollow){


            //关注,新增数据
            Follow follow = new Follow();
            follow.setUserId(userId);
            follow.setFollowUserId(followUserId);
            boolean isSuccess = save(follow);
            if(isSuccess){


                //放入集合
                stringRedisTemplate.opsForSet().add(key, followUserId.toString());
            }
        }else{


            //取关
            boolean isSuccess = remove(new QueryWrapper<Follow>()
                    .eq("user_id", userId).eq("follow_user_id", followUserId));
            if(isSuccess){


                //从Redis中移出关注用户的id
                stringRedisTemplate.opsForSet().remove(key, followUserId.toString());
            }
        }
        return Result.ok();
    }
实现共同关注
FollowServiceImpl:
	@Override
    public Result followCommons(Long id) {


        Long userId = UserHolder.getUser().getId();
        String key1 = "follows:" + userId;
        String key2 = "follows:" + id;
        Set<String> intersect = stringRedisTemplate.opsForSet().intersect(key1, key2);
        if(intersect == null || intersect.isEmpty()){


            return Result.ok(Collections.emptyList());
        }
        //将id解析成Long型
        List<Long> ids = intersect.stream().map(Long::valueOf).collect(Collectors.toList());
        //查询用户,需要注入IuserService类,查询出来再转成DTO
        List<UserDTO> users = userService.listByIds(ids)
                .stream()
                .map(user -> BeanUtil.copyProperties(user, UserDTO.class))
                .collect(Collectors.toList());
        return Result.ok(users);
    }
Feed流(关注推送)
方案分析
关注推送也叫Feed流,也叫投喂,为用户持续提供体验,通过无线下拉刷新获取新信息。
Feed不再是用户自行去查询内容,而是内容自动推送匹配给用户。
Feed流产品有2种常见模式:
TimeLine:不做内容筛选,简单按照发布时间排序,常用于好友或关注
(1)优点:信息全面,不会有缺失,实现简单
(2)缺点:信息噪音多,用户不一定感兴趣
智能排序:利用智能算法屏蔽违规的、用户不感兴趣的内容。推送用户感兴趣信息
(1)优点:投喂用户感兴趣信息,用户粘度很高,容易沉迷
(2)缺点:若算法不精准,可能起反作用
这里是基于好友的Feed流,所以使用TimeLine模式,要做智能排序的话要自行去研究智能算法,这个还是要花不少时间看看论文啥的。TimeLine模式的实现方案有3种:
(1)拉模式(读扩散):每个用户发完就放在发件箱,要读的时候就把所有关注的人的消息都读出来
(2)推模式(写扩散):发完笔记直接就推给每个粉丝的收件箱,收件箱做排序
(3)推拉结合:读写混合,结合两种模式的优点(活跃粉丝的用推模式,普通粉丝用拉模式)
因此,对于有大V的那类社交软件(例如围脖),最好的方式是,当一个用户发笔记的时候,要能直接发到其活跃粉丝的收件箱中,同时自己的邮件也发送到自己的发件箱中,当普通的用户要读取自己的笔记的时候再拿出来。
在这个项目里,将会使用推模式,当每个人发表探店笔记的时候,都需要推送笔记id到其粉丝的收件箱中,粉丝需要的时候就根据这个id即可查询到笔记。
我们可以利用Redis的数据结构来实现需求:
收件箱要根据时间戳排序,需要用Redis的数据结构,容易想到SortedSet。
查收件箱时,要能够分页查询,需要数据集合有角标,容易想到List。
虽然SortedSet没有分页查询需要的角标,但SortedSet却具有排名性质。又因为Feed流的数据是会不断更新的,数据角标也会变化,因此不能用传统的分页模式。
传统分页会出现重复读取的情况:
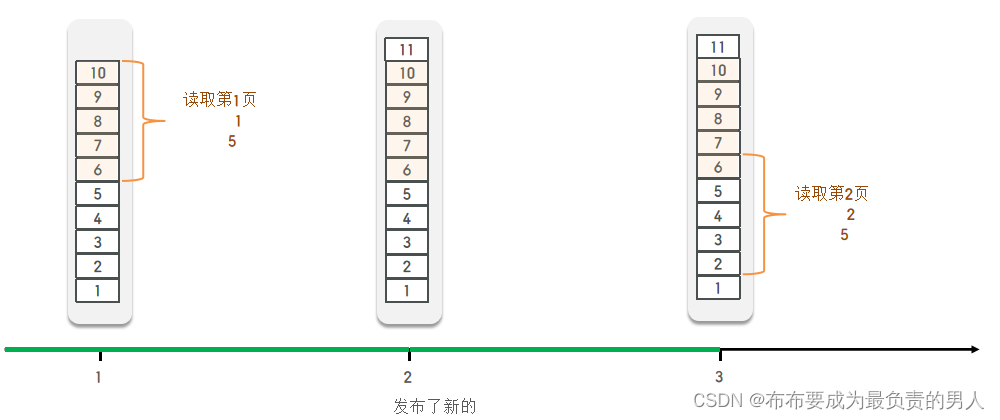
因此需要使用滚动分页查询:
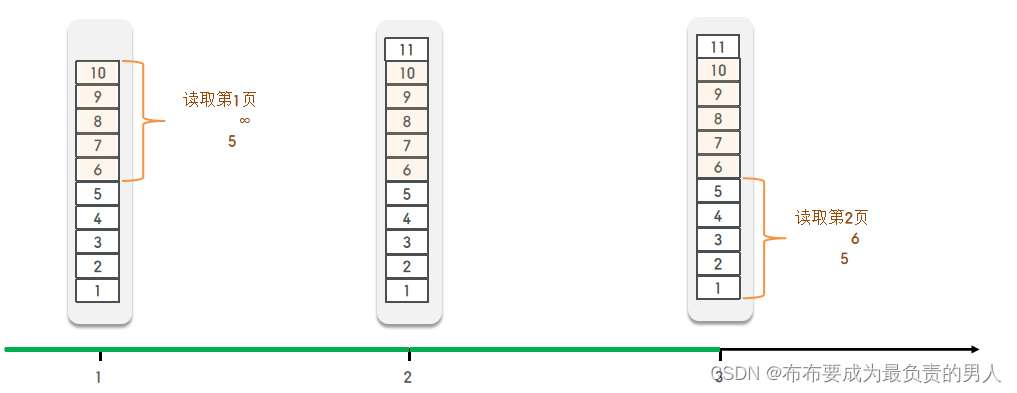
因此,我们应该使用SortedSet,并且根据score来查询。
推送到粉丝收件箱
修改saveBlog的业务,使其能够推送到收件箱:
	public Result saveBlog(Blog blog) {


        UserDTO user = UserHolder.getUser();
        blog.setUserId(user.getId());
        boolean isSuccess = save(blog);
        if(!isSuccess){


            return Result.fail("新增笔记失败");
        }
        //查询粉丝
        List<Follow> follows = followService.query().eq("follow_user_id", user.getId()).list();
        //推送id给粉丝
        for (Follow follow : follows) {


            //获取粉丝Id
            Long userId = follow.getUserId();
            //推送到粉丝的收件箱(SortedSet)
            String key = "feed:" + userId;
            stringRedisTemplate.opsForZSet().add(key, blog.getId().toString(), System.currentTimeMillis());
        }
        return Result.ok(blog.getId());
    }
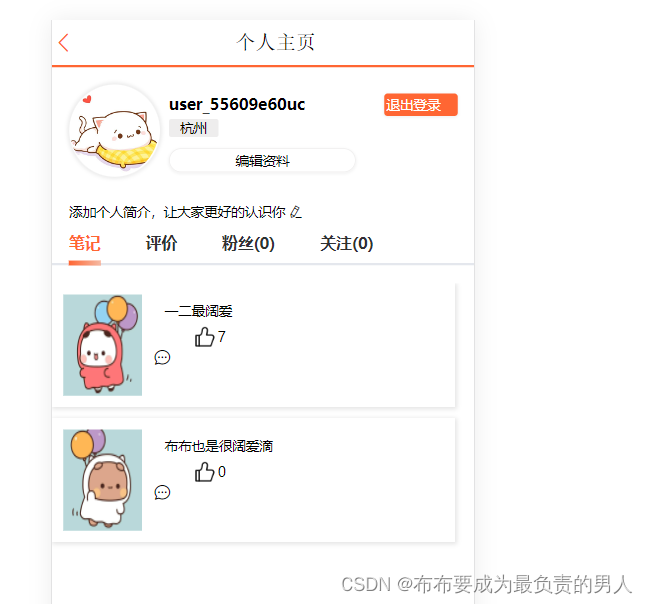
再发一条,粉丝可以在收件箱中看到:
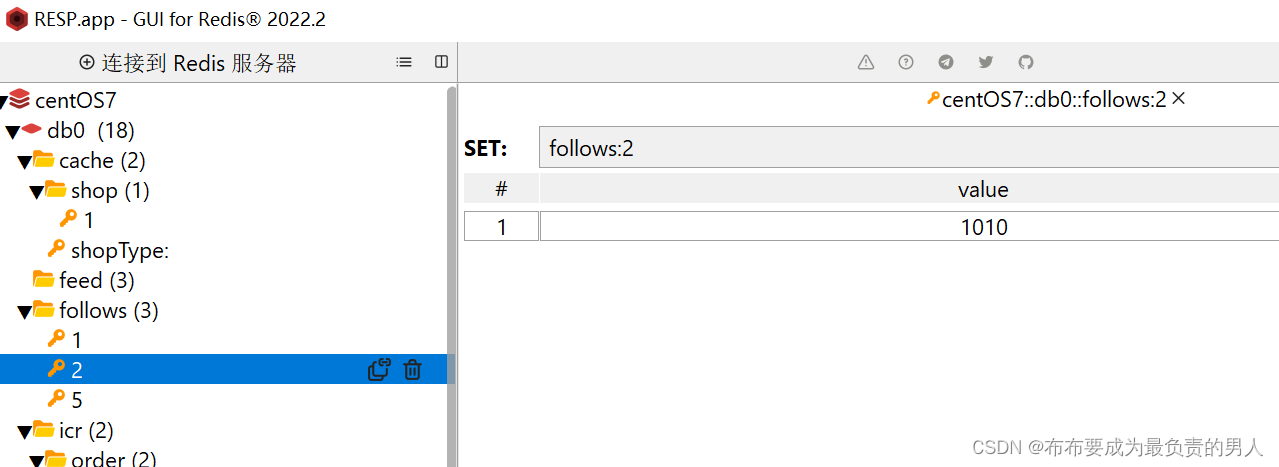
滚动分页查询收件箱
已经推送,现在需要粉丝来查询。需要再熟悉一下SortedSet的一些相关命令,可以看我之前的文章:
Redis常见命令
思路
如果我们根据角标来查询(ZREVRANGE),就会出现重复查询的情况,因此应该要以分数来查询(ZRANGEBYSCORE),下一页的查询直接根据上一页查询中分数的最小值的角标位置即可。
ZREVRANGEBYSCORE key MAX_SOCRE MIN_SOCRE WITHSCORES LIMIT L R
表示查询分数区间在(MAX_SCORE, MIN_SOCRE]的元素中的[L, R)之间的元素
由于时间戳可能是会有一样的,所以查询出来的结果,要查询起来还得用(L,R]来跳过,根据业务,可以将滚动分页查询设置为:
MAX_SOCRE:上一次查询的最小时间戳 | 当前时间戳(若是第一页的话,当前时间戳一定会大于容器内所有score)
MIN_SCORE:0
offset:在上一次的结果中,与最小值一样的元素的个数 | 0(第一页第一次查询)
count:固定的指定查几条
在个人主页的“关注”中,携带上一次查询的最小时间戳与偏移量,使用GET查询推送的Blog,并返回List
实现
1、 封装一下返回值:;
@Data
public class ScrollResult {


    private List<?> list;//定义成泛型
    private Long minTime;
    private Integer offset;
}
BlogController:
	@GetMapping("/of/follow")
    public Result queryBlogOfFollow(
            @RequestParam("lastId") Long max, @RequestParam(value = "offset", defaultValue = "0") Integer offset){


        return blogService.queryBlogOfFollow(max, offset);
    }
BlogServiceImpl:
@Override
    public Result queryBlogOfFollow(Long max, Integer offset) {


        //获取当前用户,查询其收件箱
        Long userId = UserHolder.getUser().getId();
        String key = FEED_KEY + userId;//FEED_KEY = "feed:"
        Set<ZSetOperations.TypedTuple<String>> typedTuples = stringRedisTemplate.opsForZSet().reverseRangeByScoreWithScores(key, 0, max, offset, 2);
        if(typedTuples == null || typedTuples.isEmpty()){


            return Result.ok();
        }
        //解析数据,blogId、minTime、offset
        List<Long> ids = new ArrayList<>(typedTuples.size());
        long minTime = 0;
        int os = 1;//数一下最小值的个数
        for (ZSetOperations.TypedTuple<String> tuple : typedTuples) {


            //获取BlogId
            String idStr = tuple.getValue();
            ids.add(Long.valueOf(idStr));
            //获取分数(时间戳)
            long time = tuple.getScore().longValue();
            if(time == minTime) os++;
            else{


                minTime = time;
                os = 1;
            }
        }
        //查询blog,因为mysql会用IN来查询,所以需要指定OrderBY
        String idStr = StrUtil.join(",", ids);
        List<Blog> blogs = query().in("id", ids).last("ORDER BY FIELD(id," + idStr + ")").list();
        //blog要带上自己是否点赞过的信息
        for (Blog blog : blogs) {


            //查询blog相关用户
            queryBlogUser(blog);
            //查询blog是否被点赞
            isBlogLiked(blog);
        }

        //封装返回
        ScrollResult r = new ScrollResult();
        r.setList(blogs);
        r.setOffset(os);
        r.setMinTime(minTime);
        return Result.ok(r);
    }
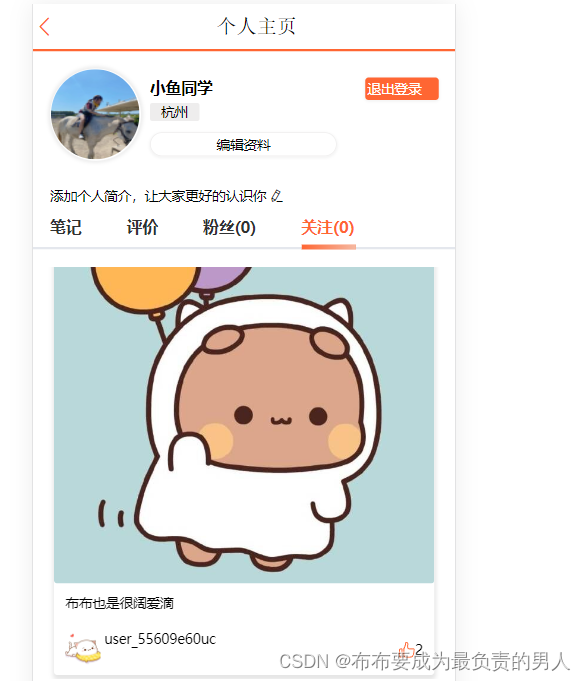
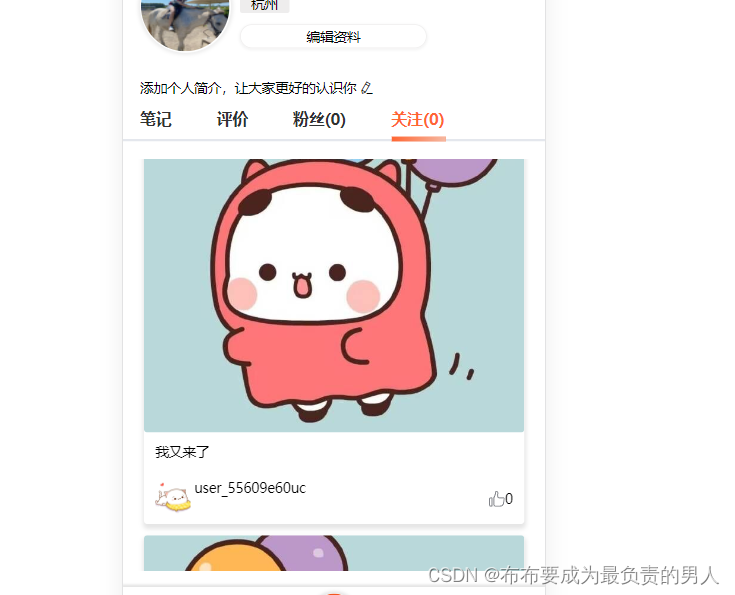
这时候关注的人再发一条笔记,往下滚动看不见,但是网上滚动即可刷新,然后发现这一条:
版权声明:本文不是「本站」原创文章,版权归原作者所有 | 原文地址: