SpringMVC中参数处理
代码模拟:
注释里有说明!!!
package com.controller;

import com.pojo.User;
import org.springframework.format.annotation.DateTimeFormat;
import org.springframework.stereotype.Controller;
import org.springframework.web.bind.annotation.PathVariable;
import org.springframework.web.bind.annotation.RequestMapping;

import javax.servlet.http.HttpServletRequest;
import javax.servlet.http.HttpSession;
import java.util.Date;

@Controller
public class MyCon2 {


    /*
     * springmvc01/demo5/DQC/123/uuu
     *  这种数据传递的方式,就是可以叫数据传递变得更加的安全
     * */
    @RequestMapping("/demo5/{name}/{pwd}")
    public String demo5(@PathVariable String name, @PathVariable String pwd) {


        System.out.println(name + "--" + pwd);
        return "success.jsp";
    }

    /***
     * 参数接受方式四:
     *  可以接受字符串或者是字符串数组
     *  sql的Date 只是含有年月日
     *  util 中的Date 不仅含有年月日还有时分秒
     *  @DateTimeFormat :接受日期格式的数据
     *  @DateTimeFormat(pattern = "指定日期的格式")
     * */
    @RequestMapping("demo4")
    public String demo4(String[] hobby, @DateTimeFormat(pattern = "HH:mm:ss") Date birth) {


        System.out.println(hobby[0] + "---" + birth);
        return "success.jsp";
    }

    /**
     * 参数接受方式三:
     * <p>
     * 参数可以直接使用对象进行接受
     * <p>
     * 如果使用对象进行接受参数的时候需要注意;
     * 现在表单中的name属性必须和接受参数对象中的实体属性名保持一致
     */

    @RequestMapping("demo3")
    public String demo3(User user) {


        System.out.println(user);
        return "success.jsp";
    }

    /**
     * 参数接受方式二:
     * <p>
     * 需要注意: 使用这种方式进行数据接受的时候,需要保证形参的名称和
     * 前台form表单name的值必须要一致
     * <p>
     * 400 :数据类型转化处理错误!!!
     */

    @RequestMapping("demo2")
    public String demo2(String uname, String pwd, int age) {


        System.out.println(uname + "--" + pwd + "---" + age);
        return "success.jsp";
    }

    /**
     * 参数获得方式一:
     * <p>
     * String uname = request.getParameter("uname");
     * <p>
     * 需要注意:我们需要的内置对象直接可以当作参数进行传递过来直接使用。
     */
    @RequestMapping("demo1")
    public String demo1(HttpServletRequest request) {


        String uname = request.getParameter("uname");
        String pwd = request.getParameter("pwd");
        System.out.println(uname + "---" + pwd);
        return "success.jsp";
    }
}
package com.pojo;

import org.springframework.format.annotation.DateTimeFormat;

import java.util.Date;

public class User {


    private String uname;

    private String pwd;

    private int age;

    @DateTimeFormat(pattern = "yyyy-MM-dd")
    private Date birth;

    public String getUname() {


        return uname;
    }

    public void setUname(String uname) {


        this.uname = uname;
    }

    public String getPwd() {


        return pwd;
    }

    public void setPwd(String pwd) {


        this.pwd = pwd;
    }

    public int getAge() {


        return age;
    }

    public void setAge(int age) {


        this.age = age;
    }

    public User(String uname, String pwd, int age) {


        this.uname = uname;
        this.pwd = pwd;
        this.age = age;
    }

    public User() {


    }

    @Override
    public String toString() {


        return "User{" +
                "uname='" + uname + '\'' +
                ", pwd='" + pwd + '\'' +
                ", age=" + age +
                '}';
    }
}
<?xml version="1.0" encoding="UTF-8"?>
<beans xmlns="http://www.springframework.org/schema/beans"
       xmlns:xsi="http://www.w3.org/2001/XMLSchema-instance"
       xmlns:mvc="http://www.springframework.org/schema/mvc"
       xmlns:context="http://www.springframework.org/schema/context"
       xsi:schemaLocation="http://www.springframework.org/schema/beans
        http://www.springframework.org/schema/beans/spring-beans.xsd
        http://www.springframework.org/schema/context
        http://www.springframework.org/schema/context/spring-context.xsd
         http://www.springframework.org/schema/mvc
        http://www.springframework.org/schema/mvc/spring-mvc.xsd">
    <!--扫描注解@Controller-->
    <context:component-scan base-package="com.controller"></context:component-scan>

    <!--@RequestMapping-->
    <mvc:annotation-driven></mvc:annotation-driven>
    <!--静态资源的放行-->
    <!--mapping:指代的是网络的地址  location:指代的是放行本地的什么资源 -->
    <mvc:resources mapping="/img/**" location="/img/"></mvc:resources>

</beans>
<%@ page contentType="text/html;charset=UTF-8" language="java" %>
<html>
<head>
    <title>Title</title>
</head>
<body>

<h1>success.jsp</h1>

</body>
</html>
<%@ page contentType="text/html;charset=UTF-8" language="java" %>
<html>
<head>
    <title>用户注册</title>
</head>
<body>
<h3>用户注册</h3>
<form action="demo4" method="post">
    <p>
        用户名:<input type="text" name="uname"/>
    </p>
    <p>
        密码:<input type="text" name="pwd"/>
    </p>
    <p>
        年龄:<input type="text" name="age"/>
    </p>
    <p>
        出生日期:<input type="text" name="birth"/>
    </p>
    <p>
        爱好:
        吃:<input type="checkbox" name="hobby" value="chi"/>
        喝:<input type="checkbox" name="hobby" value="he"/>
        玩:<input type="checkbox" name="hobby" value="wan"/>
    </p>
    <p>
        <input type="submit" value="提交"/>
    </p>
</form>
<a href="demo5?name=sxt&pwd=123">删除</a>
</body>
</html>
运行结果:
基本所有的例子都由这个界面提交数据
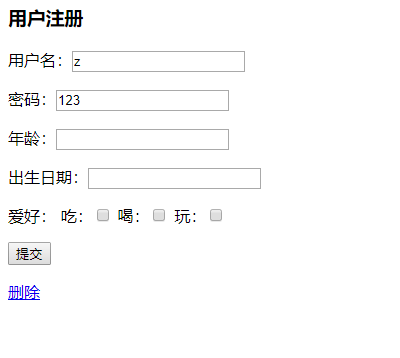
最终跳到这个界面:

Demo1:

Demo2:

Demo3:

Demo4:

Demo5:
name–pwd

版权声明:本文不是「本站」原创文章,版权归原作者所有 | 原文地址: