Spring Boot 接入 Redis 之前,先固定 Boot、Spring Data Redis、客户端和服务端版本。此处新增实验使用 Boot 3.2.4 默认的 Lettuce 路径;原文 Boot 2.3.0/Jedis 语境在历史部分保留,没有把两套配置混成同一个已验证工程。
最小工程与前提
下面 POM、应用配置类和测试文件构成可运行的 Maven 测试工程。POM 中 Netty 编解码依赖也用于本轮网络示例;它不是使用 StringRedisTemplate 必须单独添加的依赖。数据库测试在新建 Redis 7.4 容器中进行,Redis 与 Maven 共享该容器网络命名空间;没有连接宿主现有 Redis。
<project xmlns="http://maven.apache.org/POM/4.0.0" xmlns:xsi="http://www.w3.org/2001/XMLSchema-instance" xsi:schemaLocation="http://maven.apache.org/POM/4.0.0 https://maven.apache.org/xsd/maven-4.0.0.xsd">
  <modelVersion>4.0.0</modelVersion>
  <parent><groupId>org.springframework.boot</groupId><artifactId>spring-boot-starter-parent</artifactId><version>3.2.4</version></parent>
  <groupId>site.cxykk.examples</groupId><artifactId>phase5-examples</artifactId><version>1.0.0</version>
  <properties><java.version>21</java.version><build.dir>${project.basedir}/target</build.dir></properties>
  <dependencies>
    <dependency><groupId>org.springframework.boot</groupId><artifactId>spring-boot-starter-data-redis</artifactId></dependency>
    <dependency><groupId>com.fasterxml.jackson.core</groupId><artifactId>jackson-databind</artifactId></dependency>
    <dependency><groupId>io.netty</groupId><artifactId>netty-codec</artifactId></dependency>
    <dependency><groupId>org.springframework.boot</groupId><artifactId>spring-boot-starter-test</artifactId><scope>test</scope></dependency>
  </dependencies>
  <build><directory>${build.dir}</directory></build>
</project>
将配置类保存到 src/test/java/site/RedisExampleApplication.java:
package site;

import org.springframework.boot.SpringBootConfiguration;
import org.springframework.boot.autoconfigure.EnableAutoConfiguration;

@SpringBootConfiguration
@EnableAutoConfiguration
public class RedisExampleApplication {}
将配置保存到 src/test/resources/application.properties;本地复现时,127.0.0.1:6379 必须是可丢弃的 Redis 实例。
spring.data.redis.host=127.0.0.1
spring.data.redis.port=6379
spring.data.redis.database=5
spring.data.redis.timeout=2s
spring.data.redis.connect-timeout=2s
spring.main.banner-mode=off
完整测试
测试文件放在 src/test/java/site/RedisConnectionTest.java:
package site;

import java.time.Duration;
import java.util.UUID;
import org.junit.jupiter.api.Test;
import org.springframework.beans.factory.annotation.Autowired;
import org.springframework.boot.test.context.SpringBootTest;
import org.springframework.data.redis.core.StringRedisTemplate;
import static org.junit.jupiter.api.Assertions.*;

@SpringBootTest(classes = RedisExampleApplication.class)
class RedisConnectionTest {
  @Autowired StringRedisTemplate redis;
  @Test void writesAndReadsStrings() {
    String key = "phase5:connection:" + UUID.randomUUID();
    try {
      redis.opsForValue().set(key, "hello", Duration.ofSeconds(30));
      assertEquals("hello", redis.opsForValue().get(key));
      assertTrue(redis.getExpire(key) > 0);
      System.out.println("spring-string=hello; ttl-positive=true");
    } finally { redis.delete(key); }
  }
}
mvn -Dtest=RedisConnectionTest test
本次测试输出包含:
spring-string=hello; ttl-positive=true
结论边界
本次断言核对回读值与 TTL 为正,finally 只删除随机创建的测试键。没有验证 Jedis 连接池、密码认证、集群、缓存一致性或部署安全。原文的 Windows run.bat 及历史演示密码不是新增工程的启动方案;新版默认路径也不能写成始终使用 Jedis。
下一步阅读
历史范例(未重建原环境)
以下保留旧资料的示例与输出,并校正语言标记和已发现的概念错误。含 MariaDB、旧 PHP/PDO、旧 Redis 或旧 JDK 语境的片段,本轮没有逐一运行;新实验的验证结论只适用于上方完整源码。不要把历史截图中的结果当作本轮输出。
目录
- 1.简介
- 2.版本
- 3.在 Windows 下启动 Redis
- 4.集成步骤
- 5.知识点补充
1.简介
此历史资料围绕 Boot 2.3.0 展示 Jedis 配置;客户端由依赖与配置决定,不能推断所有 Boot 工程都使用 Jedis。
2.版本
- springVersion: 5.2.6.RELEASE
- springBootVersion: 2.3.0.RELEASE
3.在 Windows 下启动 Redis
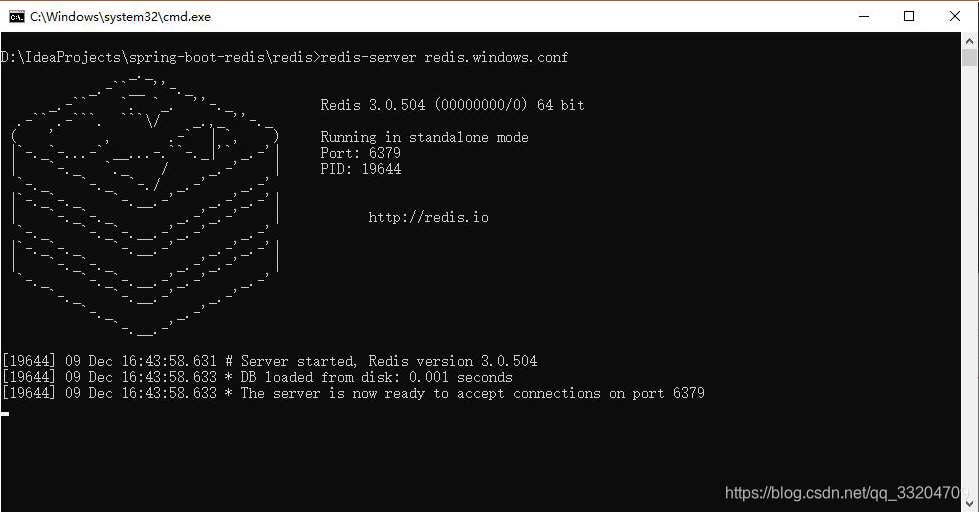
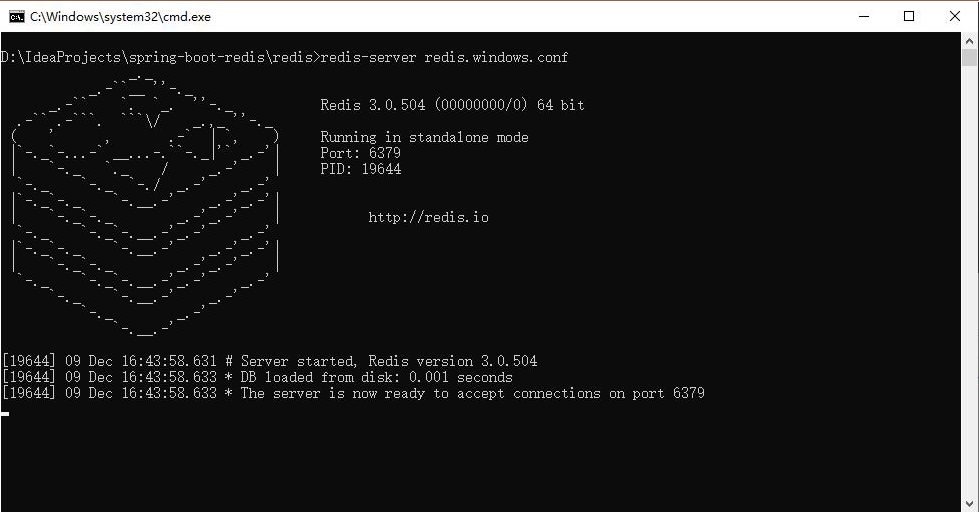
在redis 文件夹下面,双击 run.bat 启动 Redis
4.集成步骤
1.maven 坐标
<!-- Redis -->
<dependency>
    <groupId>org.springframework.boot</groupId>
    <artifactId>spring-boot-starter-data-redis</artifactId>
</dependency>
2.application.yml
spring:
  #redis基础配置
  redis:
    # Redis服务器地址
    host: 127.0.0.1
    # Redis数据库索引(默认为0)
    database: 0
    # Redis服务器连接端口
    port: 6379
    # 链接超时时间 单位 ms(毫秒)
    timeout: 3000
    # 密码
    password: 123456
    # 连接池配置(jedis/lettuce)
    jedis:
      pool:
        # 连接池中的最大空闲连接 默认 8
        max-active: 8
        # 连接池最大阻塞等待时间(使用负值表示没有限制) 默认 -1
        max-wait: -1
        # 连接池中的最大空闲连接 默认 8
        max-idle: 8
        # 连接池中的最小空闲连接 默认 0
        min-idle: 0
3.RedisConfig.java
@Configuration
public class RedisConfig {


    /**
     * 配置RedisTemplate
     *
     * @param redisConnectionFactory 连接工厂
     * @return RedisTemplate
     */
    @Bean
    public RedisTemplate<String, Serializable> redisTemplate(RedisConnectionFactory redisConnectionFactory) {


        RedisTemplate<String, Serializable> redisTemplate = new RedisTemplate<>();
        //设置key的存储方式为字符串
        redisTemplate.setKeySerializer(new StringRedisSerializer());
        //设置为value的存储方式为JDK二进制序列化方式,还有jackson序列化方式(Jackson2JsonRedisSerialize)
        redisTemplate.setValueSerializer(new JdkSerializationRedisSerializer());
        //设置连接工厂
        redisTemplate.setConnectionFactory(redisConnectionFactory);
        return redisTemplate;
    }
}
4. 测试
@RunWith(SpringRunner.class)
@SpringBootTest
public class SpringBootRedisApplicationTests {


    @Autowired
    private RedisTemplate<String, String> strRedisTemplate;
    @Autowired
    private RedisTemplate<String, Serializable> serializableRedisTemplate;

    @Test
    public void testString1() {


        strRedisTemplate.opsForValue().set("redis_test:strKey", "acgkaka");
        System.out.println(strRedisTemplate.opsForValue().get("redis_test:strKey"));
    }

    @Test
    public void testString2() {


        strRedisTemplate.boundValueOps("redis_test:strKey222").set("acgkaka222");
        System.out.println(strRedisTemplate.boundValueOps("redis_test:strKey222").get());
    }

    @Test
    public void testSerializable() {


        UserEntity user = new UserEntity();
        user.setId(1L);
        user.setUserName("清风烟柳");
        user.setUserSex("男");
        serializableRedisTemplate.opsForValue().set("redis_test:user", user);
        UserEntity user2 = (UserEntity) serializableRedisTemplate.opsForValue().get("redis_test:user");
        System.out.println("user:" + user2.getId() + "," + user2.getUserName() + "," + user2.getUserSex());
    }
}
运行结果1:
运行结果2:
运行结果3:
原资料称这两种调用能存取值,未提供覆盖全部行为的比较;本轮没有复测其旧工程,不能据此认定两者所有语义相同。
Redis Desktop Manager
数据1:
数据2:
数据3: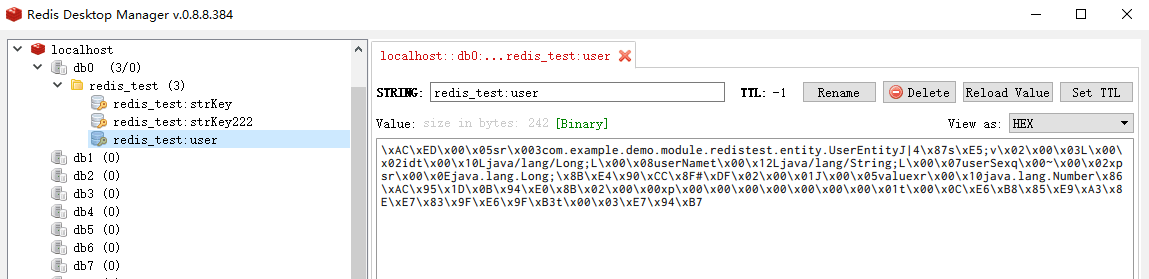
5.知识点补充
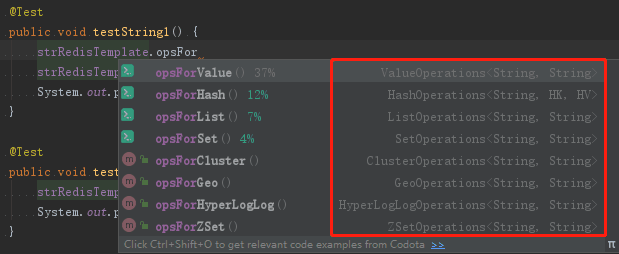
- ValueOperations:简单K-V操作
- HashOperations:针对Map类型的数据操作
- ListOperations:针对List类型的数据操作
- SetOperations:Set类型数据操作
- ClusterOperations:Cluster集群分区操作
- GeoOperations:地理空间操作
- HyperLogLogOperations:被用于估计一个 set 中元素数量的概率性的数据结构操作
- ZSetOperations:ZSet类型数据操作(ZSet是有序Set)
源码地址:https://github.com/ACGkaka/spring-boot-redis
版权声明:本文不是「本站」原创文章,版权归原作者所有 | 原文地址: